Archives For Video

Ever since I watched the DSLR Video Shooter – Full Youtube Studio on ONE SINGLE STAND! I knew that if or when I had the space that this would be my next video setup. Since we moved in July I now not only have the space I have several different settings that I can use my video setup on a single stand.

I have just started testing the setup and the following is how I used this stand in my backyard to run a class meeting. I have an assortment of options on how I can configure this stand since I have used Manfrotto super clamps and other higher-end accessories. I went with a bit heavier stand than what Caleb in the DSLR Video Shooter video had recommended and while the weight and size are a bit of an issue the stability and ease of use are great. I wanted to have a stand that I could use in as many settings and my initial tests are confirming the heavier stand was a good choice.

We have an amazing backyard and garden so while I can, I am enjoying the sun and shade and will be running my class meetings and shooting my next few series of instructional videos outside.

I will be recording several videos for some new courses I am developing so I will be testing out this stand and will be experimenting with a variety of configurations. Adding my DSLR and teleprompter will be as easy as clamping on another super clamp and ball head and then adding the camera.

Once I get things sorted out I will be adding another section to my Dwayne’s DIY Video Setup series. Looking forward to sharing what I learn.

I have been exploring how to bring about effective organizational change for many years. A quick search for the word “change” on my blog will reveal many posts. My analysis and evaluation started back in 2010, when I was still advocating for Kotter’s Eight-Stage Process of Creating Change but I was starting to see that there were some significant challenges to this process. By 2012 I was starting to explore broader ideas and looking for more of a synthesis to leading change as the post Recommended Readings on Leading Change In Education will reveal. I was recognizing that if you really wanted to bring about effective change you had to Practice Change by Living It and you had to acknowledge that The Head Won’t Go Where the Heart Hasn’t Been.

My synthesis of thinking about change started to come together after some significant failures in a few change strategies I had undertaken in 2011-2012. I had religiously used Kotter’s Eight-Stage process and I even focused on creating a sense of urgency but there was something missing. Without going to significant details on the situations my evaluation of what had happened and my analysis of what could be doing better revealed that there were many other factors that all had to come together. The following is an excerpt from a 2014 post I made in reaction to Seth Godin’s post – People Who Like This Stuff. This post is where the synthesis of effective organization change that is outlined in the Learner’s Mindset Discussion had its formation. Most of my thinking is still the same but in the last six years, I have added a Crucial Conversations component to the self-differentiated leader’s section because of the challenges everyone is facing today in trying to have conversations about even the smallest things.

One of the advantages of working through authentic projects is that they force one to continually evaluate what is working and what can be done better. If one hopes to change their own world and the world for their learners one must remain in the higher-order thinking of evaluation, analysis, synthesis, and creation which is also a key aspect of the Learner’s Mindset.

To see the full post you can go to People who like this stuff…like this stuff.

Why is change in education so slow and so difficult? I think Seth Godin offers one of the most simple and elegant explanations…

“People who like this stuff…like this stuff”

Godin goes onto explain that:

“…for those that are already in it, you can’t push too far, because they like the genre. That’s why they’re here.”

Those who have walked away probably aren’t just waiting around for you to fix it. Those who have never been, don’t think the genre has a problem they need solved.”

If we apply this elegant thinking to the challenges we face in improving education, then most educators who like this stuff [traditional learning environments}… like this stuff. Most people who don’t, have walked away as we can see by homeschooling, unschooling, and uncollege movements. Perhaps more importantly, for those (students, parents, and politicians) who have never been behind the scenes of our traditional educational system, there is no problem. Or the problems that they can see are simply ones that appeal to emotions like class size or special needs. These issues become hot buttons for political sound bites and the 6:00 news but sound research by people like John Hattie reveals that student achievement is not impacted significantly by class size but by many other factors that just aren’t as newsworthy.

How then do we get people who like this stuff (traditional education) to like new stuff (digital learning environments)? While innovating the learning environment has been a significant challenge for the past century (John Dewey was calling for a change to progressive education almost 100 years ago) it is possible and involves the following four steps.

1 Start with Why – In his popular TED talk Simon Sinek makes the argument that “people won’t buy what you do they buy why you do it”, so rather than telling traditional educators what they should or need to be doing to improve learning you need to provide a reason why they would want to add to or improve the current system. This has to be an emotional appeal. Sinek provides a fully developed argument for starting with why and how to use the Golden Circle in his book Start with Why: How Great Leaders Inspire Everyone to Take Action.

2. Identify and enlist key influencers – There are key social leaders within all organizations that have the influence to bring about the small activities that can start the behavioral change that leads to organizational change. Once you can identify one or two key activities and give these influencers the reason why they should be making these changes you can start the process of implementing digital learning to enhance the traditional learning environment. Once these influencers like the new stuff they will give others reason to like the new stuff as well. The book Influencer: The New Science of Leading Change, Second Edition provides an exceptional explanation of how to start behavioral change.

3. Install an effective execution strategy – You can’t change everything within an organization at once. You still have the whirlwind of the day-to-day activities that will consume 80-90% of your efforts. However, the key activities that your influencers are willing to change can become the one or two wildly important goals (WIG) that make up the foundation of The 4 Disciplines of Execution: Achieving Your Wildly Important Goals (4DX) change process that has proven to be an effective strategy in executing organizational change. Once one or two aspects of the traditional environment are changed you can then move on to the next one or two activities and so on. The key is to have an effective strategy and to execute.

4. Enlist and empower self-differentiated leaders – Edwin Friedman in the book A Failure of Nerve: Leadership in the Age of the Quick Fix posits that having the conviction to keep on moving forward when everyone in your organization is screaming for the status quo is a key ability of the self-differentiated leader. These people do not need validation from the group but are able to see beyond the challenges to the broader goals of serving learners in new and productive ways. These people practice change by living it and have the ability to lead by example and can show people why they like the “new stuff” and why liking the new stuff is better for our learners and for our society as a whole.

This is not an easy process but we owe it to our children and to the young men and women who are going to our universities and colleges with dreams of building a better world.


My last posts about my DIY Video setup were back in March and April of 2019 and since that time I have continued to refine my office/studio. I had been planning on posting another part of this series earlier but each time as I was about to start writing I would wait because I had one more tweak to make or had one more item coming in that I was going to test out and integrate into my setup. I shot a video last fall about my long and costly journey to my latest shotgun/boom mic the Diety D3 Pro which I finally edited and posted last week – How to Avoid Paying $600 for a $300 Mic. I create these posts with the intent to share my lessons learned and offer some well-informed recommendations but I have just been so busy with tweaking my setup, doing research, writing articles, working on a new book, and creating and developing learning environments.

Between the start of this post and the final edits have added the Zoom PodTrak P4 and will be experimenting with this new audio interface and which should help improve and balance out the audio between my colleague and I when we do our Learner’s Mindset Discussions. I have to face the facts that I will continually be improving my video setup and my studio and I just need to take a snapshot in time. I will try to be as brief as possible and will be linking back to previous posts for those who want more details. I also initially planned on providing a full overview of my entire studio/office setup but as I started going through my audio and lighting updates I realized such a comprehensive post would be too long so I am only doing an audio and lighting update.

I will do another post where I will share more details on the hardware and equipment I am using, the physical space, the furniture, the soundproofing, and all the connective components that most people are not aware of. I will also be providing a short recommendation at the end of each of the sections below with affiliate links to where I purchased the equipment. As you can tell I have spent more than I should on my setup so if you click through and buy something from Amazon I will get a few cents that I will use to keep on improving and sharing my ideas. Please keep in mind that I am working in an extremely compressed space so size and flexibility are factors that play into my decisions and recommendations. Your situation may vary.

Audio – Getting the sound right
Microphones for Instructional Video
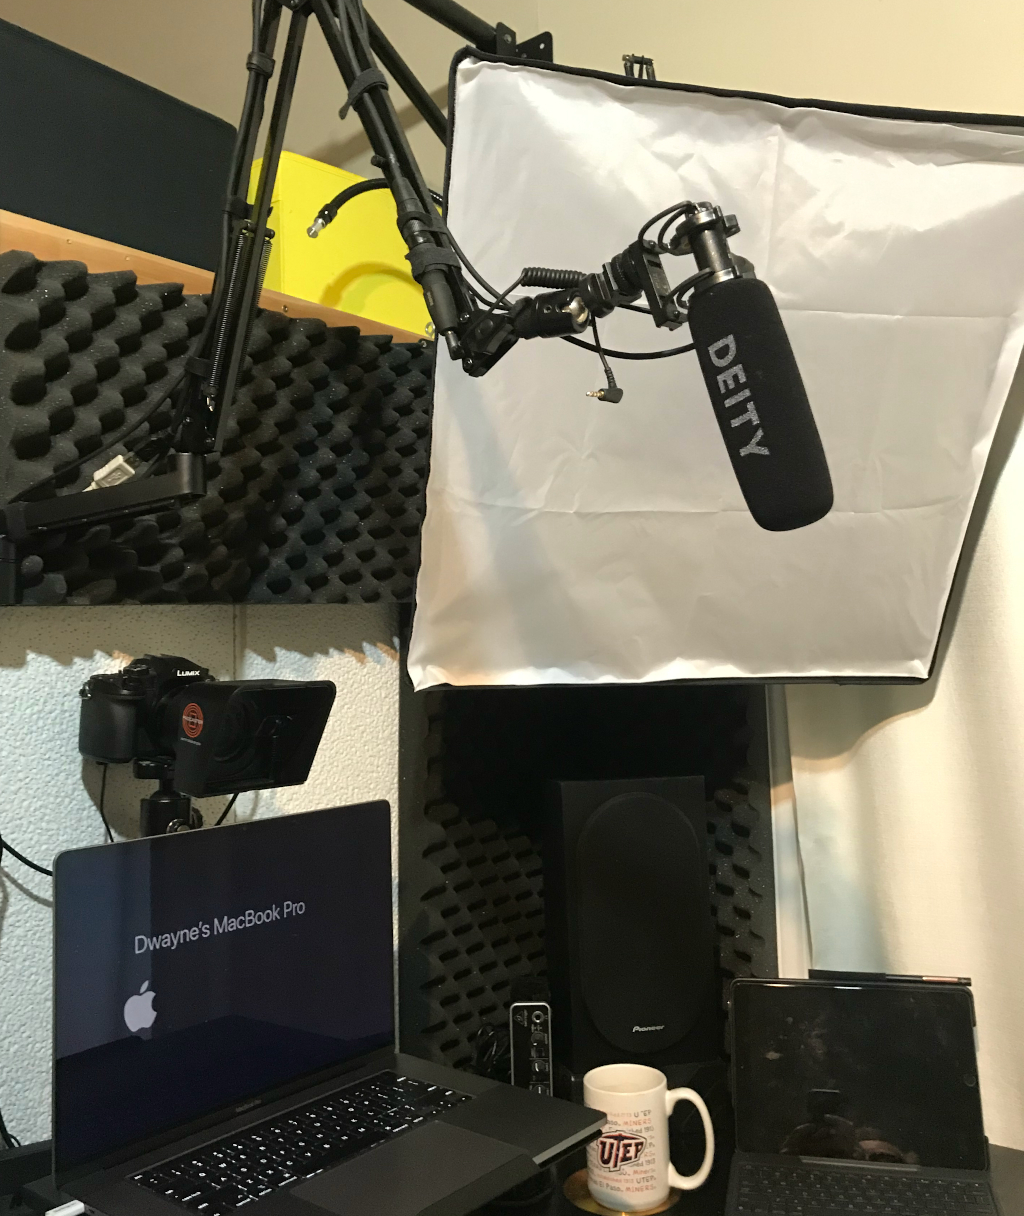
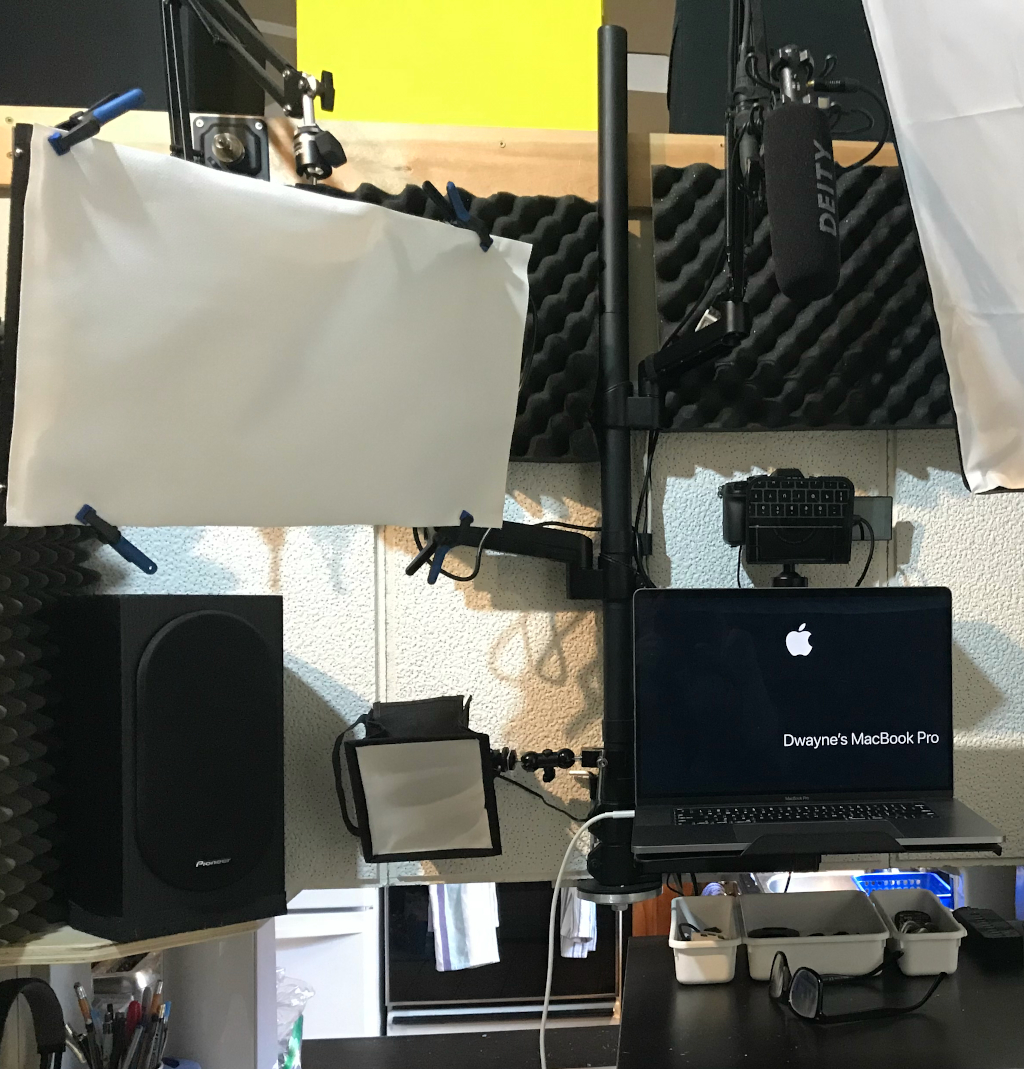
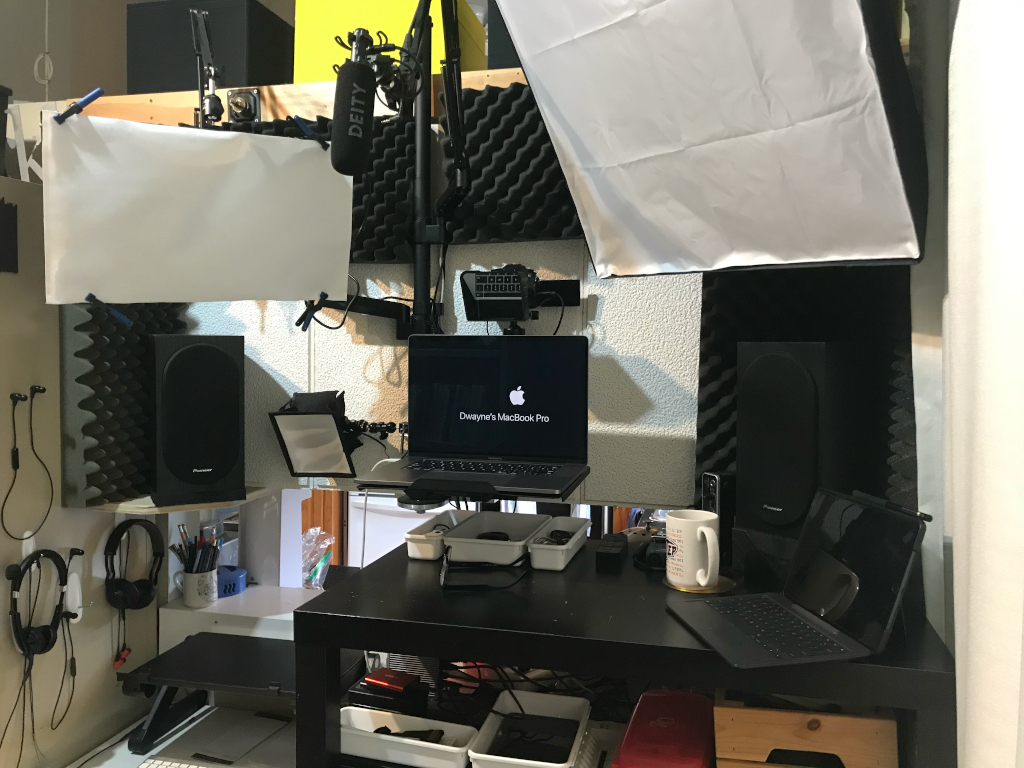
It is widely accepted that people will put up with a video that isn’t sharp but they will not tolerate poor sound. As you can see from my earlier post: Dwayne’s DIY Video Setup – Part 4 Audio I have been experimenting with more traditional podcasting condenser style microphones and used a variety of microphone stands. I have learned that since I use a standing desk I have the tendency to move too much, talk with my hands, and at times tap my desk so the more traditional podcast setup doesn’t work well for me. I am currently using a Diety D3 Pro shotgun mic that is attached to an extendable arm. One of the drawbacks of using a shotgun or boom mic is that they are very sensitive and will pick up ambient sound. With a bit of planning and scheduling as well as making sure I turn off technology notifications, fans, air conditioning, or other noisy devices the ambient sounds can be managed.

The Deity D3 Pro is a powered mic with adjustable gain which can be plugged directly into my DLSR which I do when I create my talking head type instructional videos. Deity D3 Pro can easily be adapted to XLR with the Diety XLR adapter and connected to an audio interface so it is very versatile and is currently my main mic.

Microphone/Headset for Zoom
Even before the pandemic of 2020 hit I had been using Zoom and a variety of other video conferencing solutions to engage with my students. In the 25 plus years of teaching online, I have experimented with and used every imaginable solution to improve the audio quality of my meetings. It didn’t take me too long to learn that while the inexpensive consumer-grade headsets from Logitech or Microsoft or other popular brands did offer acceptable audio they really weren’t built to last. I have spent thousands of hours in video conferencing meetings and have created thousands of feedback videos for student evaluation so I do use a headset much more than the average person. I started exploring professional or call centre type headsets and found that the audio quality and durability of these solutions justified the additional cost. I also need to point out that my office is on the main floor of an open concept area in my home so ambient noise from life is a constant challenge. I use a headset to filter out this noise as much as I use it to have quality sound in my meetings. I also do travel a fair amount (when not locked down by COVID) so it is not uncommon for me to hold meetings or create feedback videos for my students in coffee shops, airports, hotel lobbies, or other public places.

I am currently using a 4-year-old Jabra Evolve 20 headset that is discontinued but I would not hesitate to purchase the new Jabra headset. Last year I got the Jabra Evolve 40 headset for my wife when she started to teach online. I have used her headset and it works as well as the older version I currently use. When my current headset finally dies I will be replacing it with another Jabra headset. The sound quality and durability are exceptional and they just work. If you need a wired stereo headset then the Jabra Evolve 40 is one of the best wired solutions I have used.

What about wireless?
I have been experimenting with wireless headsets, headphones, and earbuds for many years and I have spent several hundreds of dollars and have quite the collection of devices. Wireless works great when you are simply listening to music or audiobooks but there can be latency issues with some Bluetooth devices which makes them less reliable for video conferencing. Latency is just the lag that happens with the Bluetooth connection. Most latency is in the millisecond range so it is not noticeable when listening to music but it can cause some issues with video conferencing. For example, it is difficult to get wireless headsets to work reliably with Adobe Connect Pro. They will connect but there are often reliability or sound quality issues. Zoom is a much more robust system and I have found that I have had better results with wireless devices and Zoom.

For example, I am currently using the Apple AirPod Pro which I recommend if you are using an Apple ecosystem and I have had greater success with AirPod Pro and Zoom. The AirPod Pro enables me to switch from my iPhone to my iPad to my MacBook Pro without any special configuration which makes then the most convenient but expensive solution. As convenient as the AirPod Pros are I will still use my wired Jabra headset when I can using video conferencing. Why? Much better sound and total reliability. You don’t purchase the AirPod Pros for the sound you get them for the convenience of switching from or between your Apple devices.

I can’t talk about wireless earbuds without mentioning the Aukey Wireless Headphones. These retail for $25 US or $40 CDN on Amazon so they are quite inexpensive but sound great, have full base, and the magnetic backs allow one to keep these corded wireless headphones around your neck when they are not in use. I purchased a pair for everyone in our household and my wife’s pair are still going strong after about 3 years. Both of my boys use these headphones on a regular basis as workout headphones. These are my go-to headphones when I am working out, running or when I am on my bike. They have proved to be almost indestructible and even if they do get damaged the replacement cost is so low that it doesn’t matter. I am on my second pair in the last 3 years which is significant when you consider how much I use them. I must admit the reason I needed to replace my first set is that I accidentally ran them through the wash. I did dry them out and they did work for a while but then the right channel finally died. If you don’t want to damage your $300+ AirPod Pros at the gym or lose them on the bike trail I recommend the Aukey Wireless Headphone.

Wireless Audio
Rode Wireless Go is my latest wireless experiment and so far it has proved to be a wonderful solution. The Wireless Go functions as a clip-on microphone or belt pack transmitter for a lavalier/headset microphone. Since it operates on its own 2.4GHz digital wireless transmission frequency it isn’t subject to the same latency or reliability issues that plague Bluetooth systems. The receiver can be attached directly to a DLSR and you can use either the built-in mic on the transmitter or plugin a lavalier mic. My older son who races Downhill and Enduro mountain bikes is currently experimenting with this system while recording his rides with a GoPro. So far, the Wireless Go has proved to be easy to use and very reliable. Once the COVID situation lifts and I am a bit more mobile I can see many more uses for this system.

Lavalier
A good lavalier mic offers one of the simplest ways to get quality audio. Several years ago I plugged a Rode Lavalier Go into my iPhone and I was able to improve my audio quality in my videos with this simple addition. You do have to sync the additional audio track to your video in post-production but this process is very simple if you have the right software.

I recently added the BOYA BY-M1 Lavalier Microphone kit to my audio gear and for a very low price, you get two professional-grade lavalier mics that can be plugged into an audio interface or my Rode Wireless Go. I originally got the BOYA mic to give my boys the option of using a lavalier while making their biking and automotive videos. These mics are very inexpensive and so if they get damaged which is more than likely in an extreme sports setting, getting a new set isn’t that much of a financial hit. We have found the audio quality to quite good and have been using these more than initially expected.

Recommendations:
Shotgun/Boom mic – Deity D3 Pro
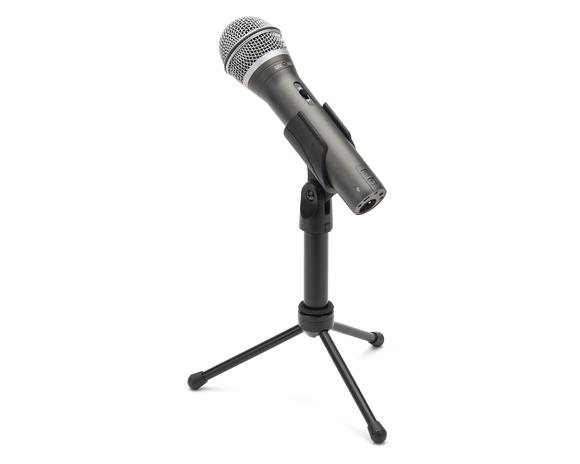
Podcast Style mic – Blue Yeti
Wired Headset for Video Conferencing – Jabra Evolve 40
Wireless earbuds/headphones – Apple AirPod Pro & Aukey Wireless Headphone
Wireless audio – Rode Wireless Go
Lavalier – Rode Lavalier Go or SmartLav & BOYA BY-M1

Audio Interface
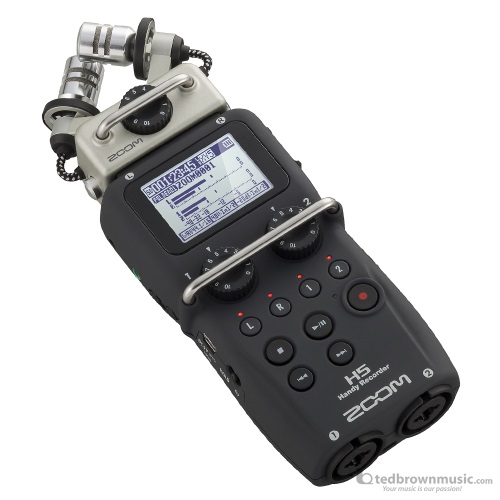
I have used a few different audio interfaces that range from entry-level Behringer U-Phoria UMC22, the Zoom H5, and more recently the Zoom PodTrak P4. When you use higher quality XLR microphones or need to mix audio from an off-site collaborator via a Zoom video conference these interfaces can simplify the task. The Zoom PodTrak P4 enables me to bring in my colleague’s audio in via Zoom and balance and mix it with my own audio. It has a built-in mix-minus feature that prevents echo or feedback for my co-host. I simply push one button and the mix-minus is on. This is so much easier than using additional cables, sound routing, and the configuration hoops I had to jump through to make this work on my Zoom H5. One of the challenges you have, when you start introducing more devices, are the additional configuration and complexity. I have been working at trying to simplify my entire workflow and limit complexity as much as possible. Learning to limit complexity is a tough lesson.

Just because you can do something it may not be the right thing to do. I had used my Zoom H5 as the pre-amp and routed the audio from the Deity D3 Pro to the H5 before feeding it back into my DSLR. It took me some time to find the right shielded audio cables that limited the audio feedback and even though I was able to have more specific control over my audio the improvement was negligible. My Panasonic G85 DSLR has clean enough pre-amps that I can simply plug my Deity D3 Pro directly into my camera which saves me having to sync my audio in post-production. While I am still going to explore more microphone and audio interface options my ultimate goal is to save time and effort in my workflow.

Recommendations:
Entry-level option – Behringer U-phoria UMC22
Portable option – Zoom H5 mobile recorder
Multisite video conferencing and podcasting option – Zoom PodTrak P4

Lighting
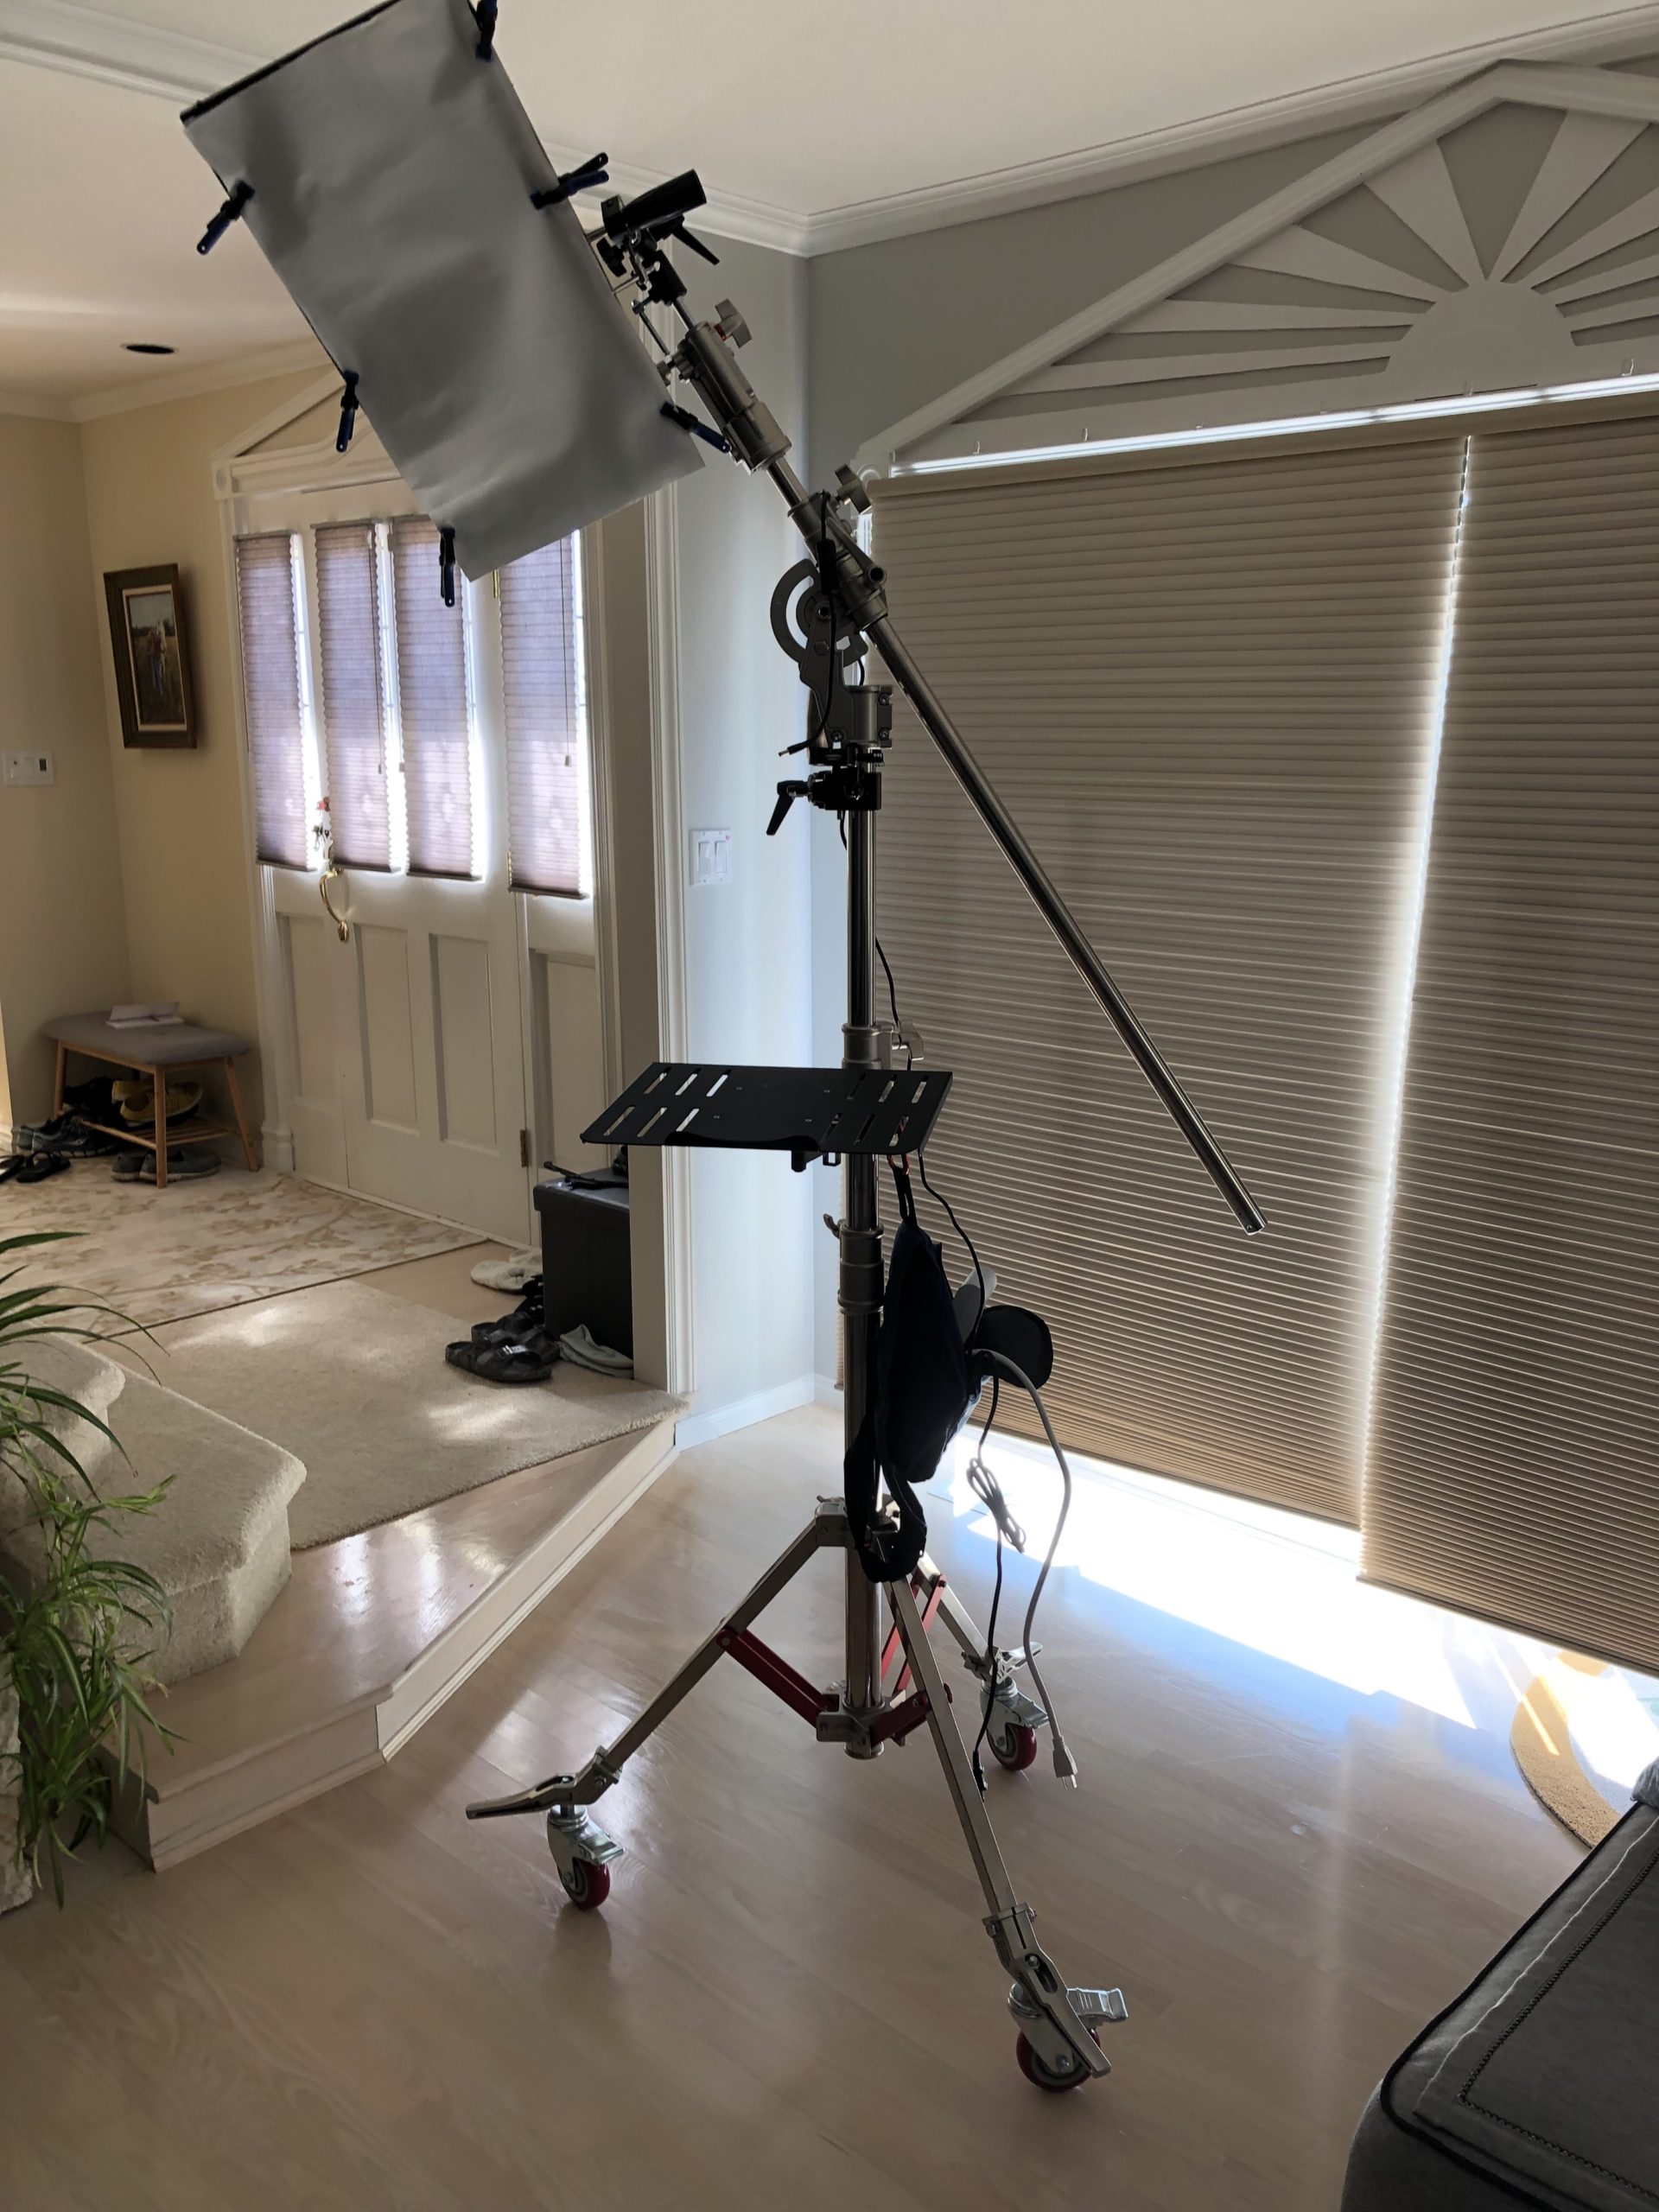
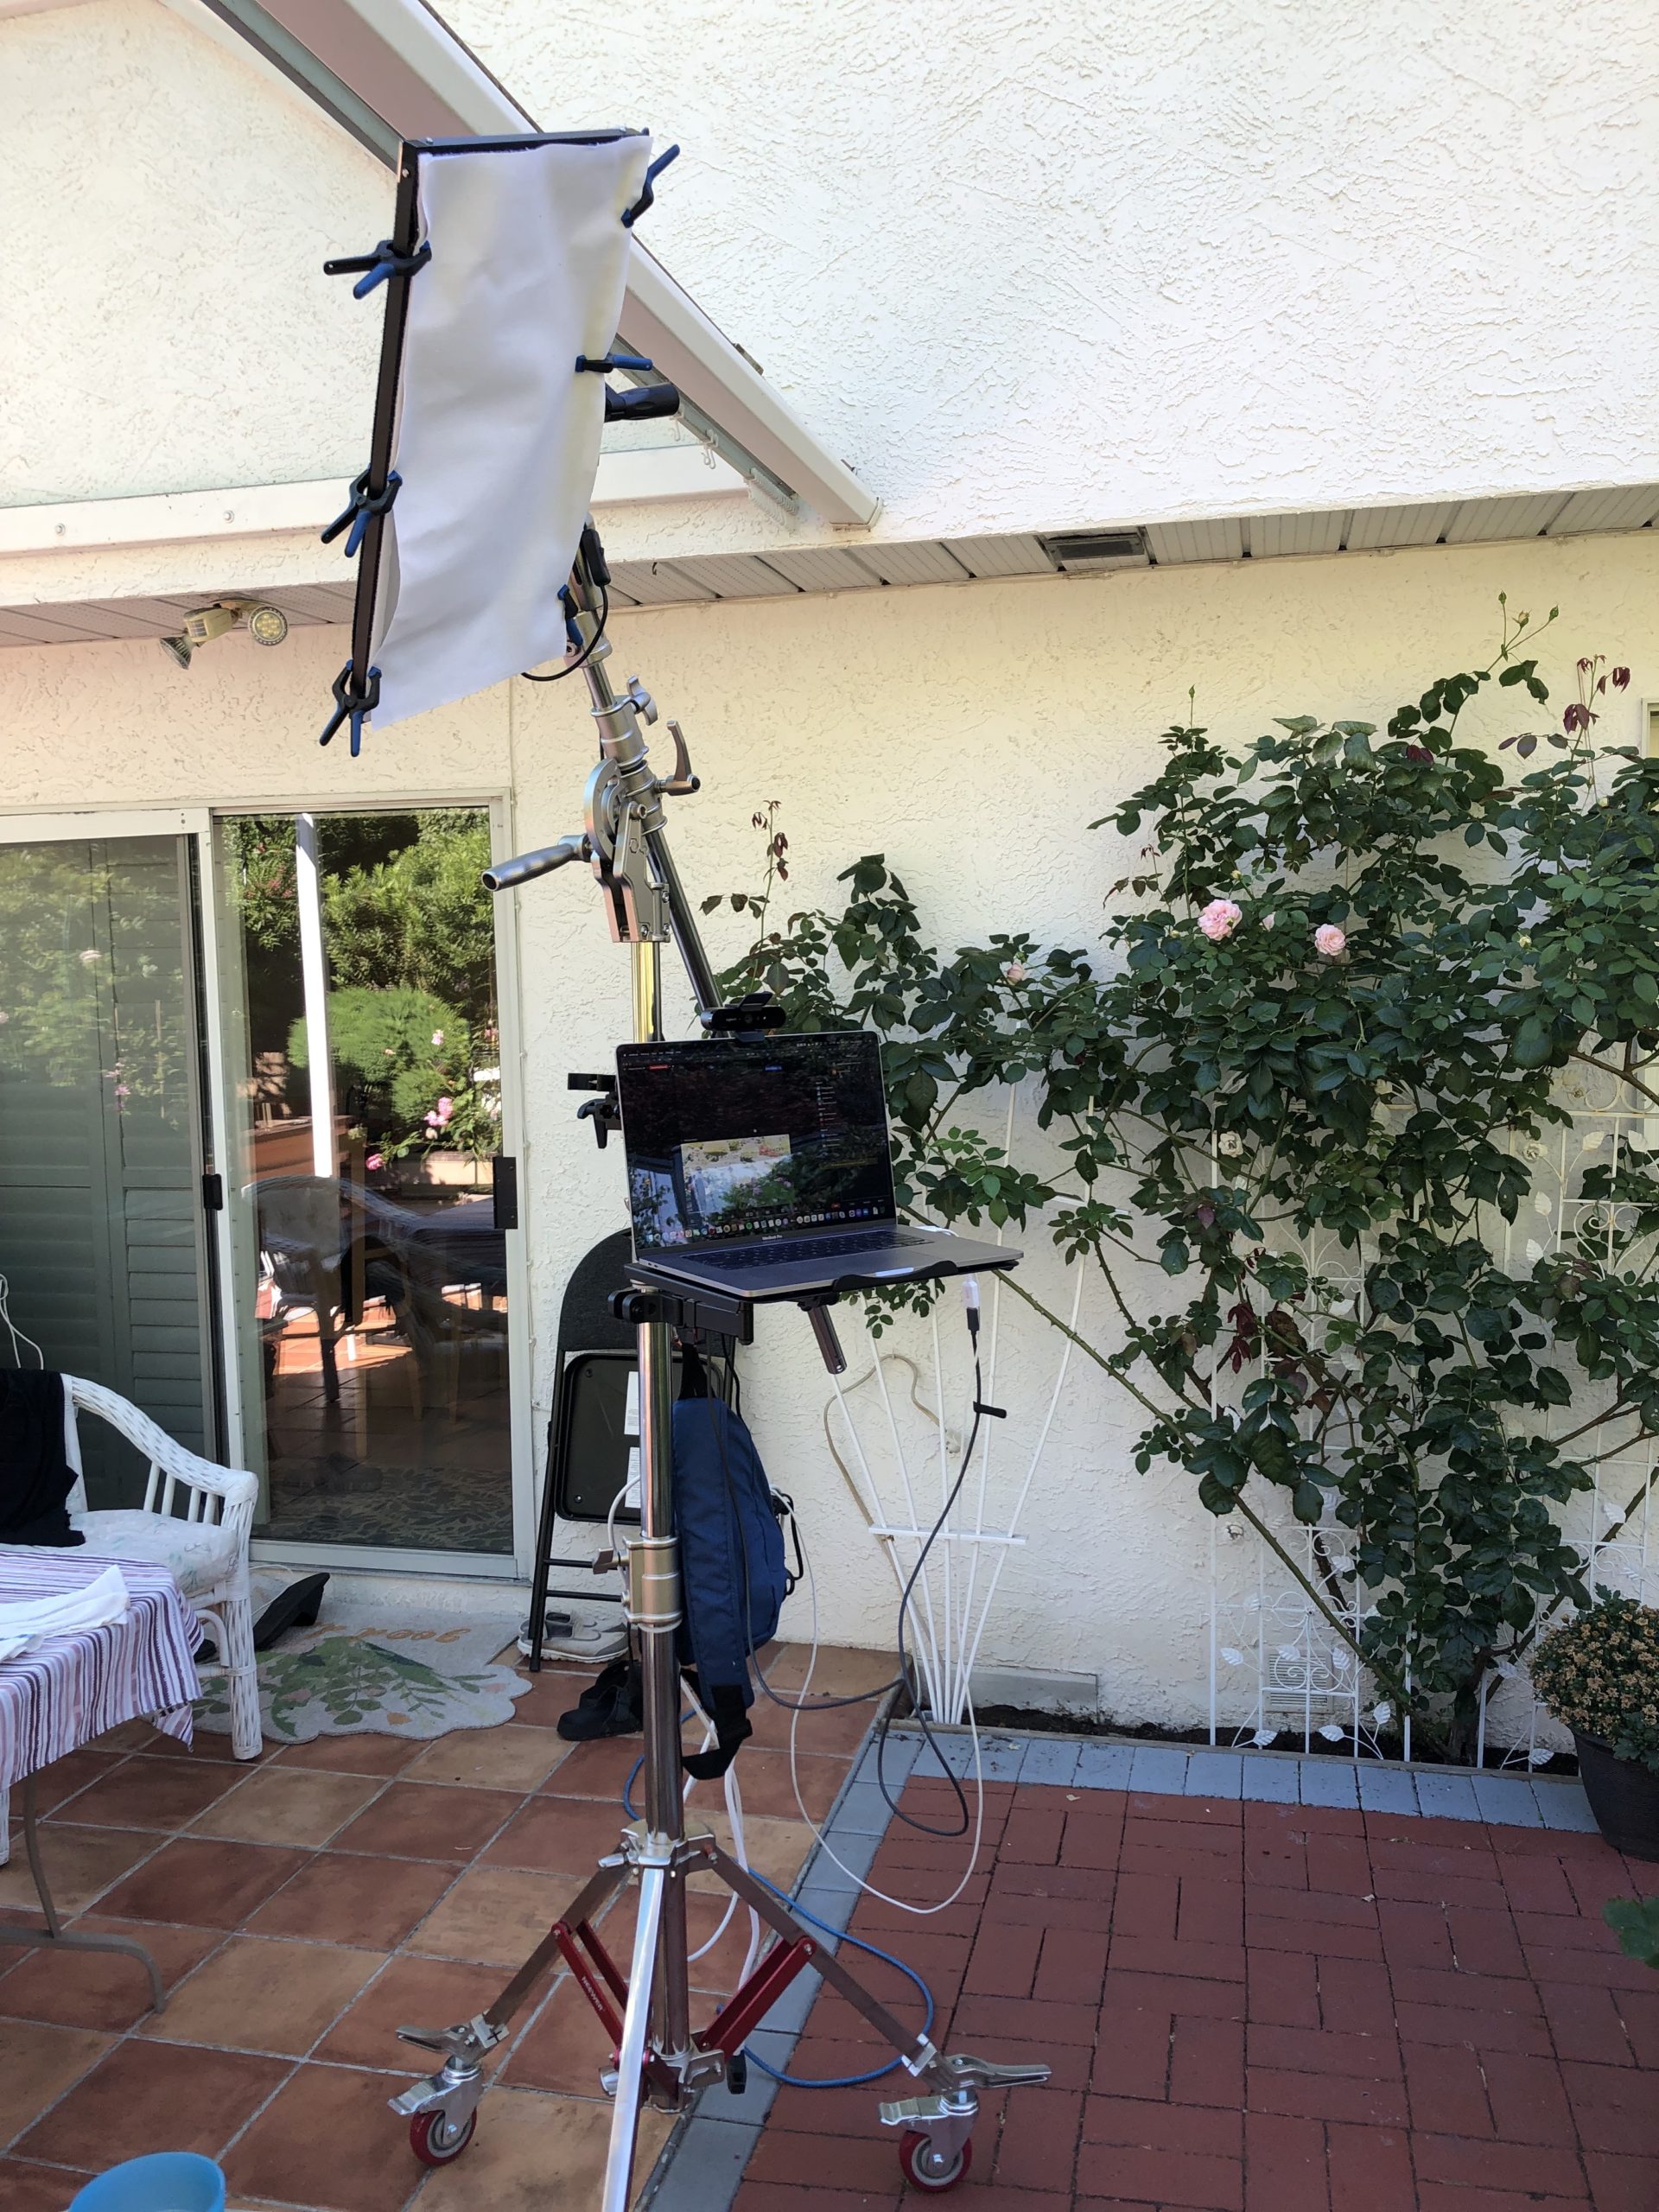
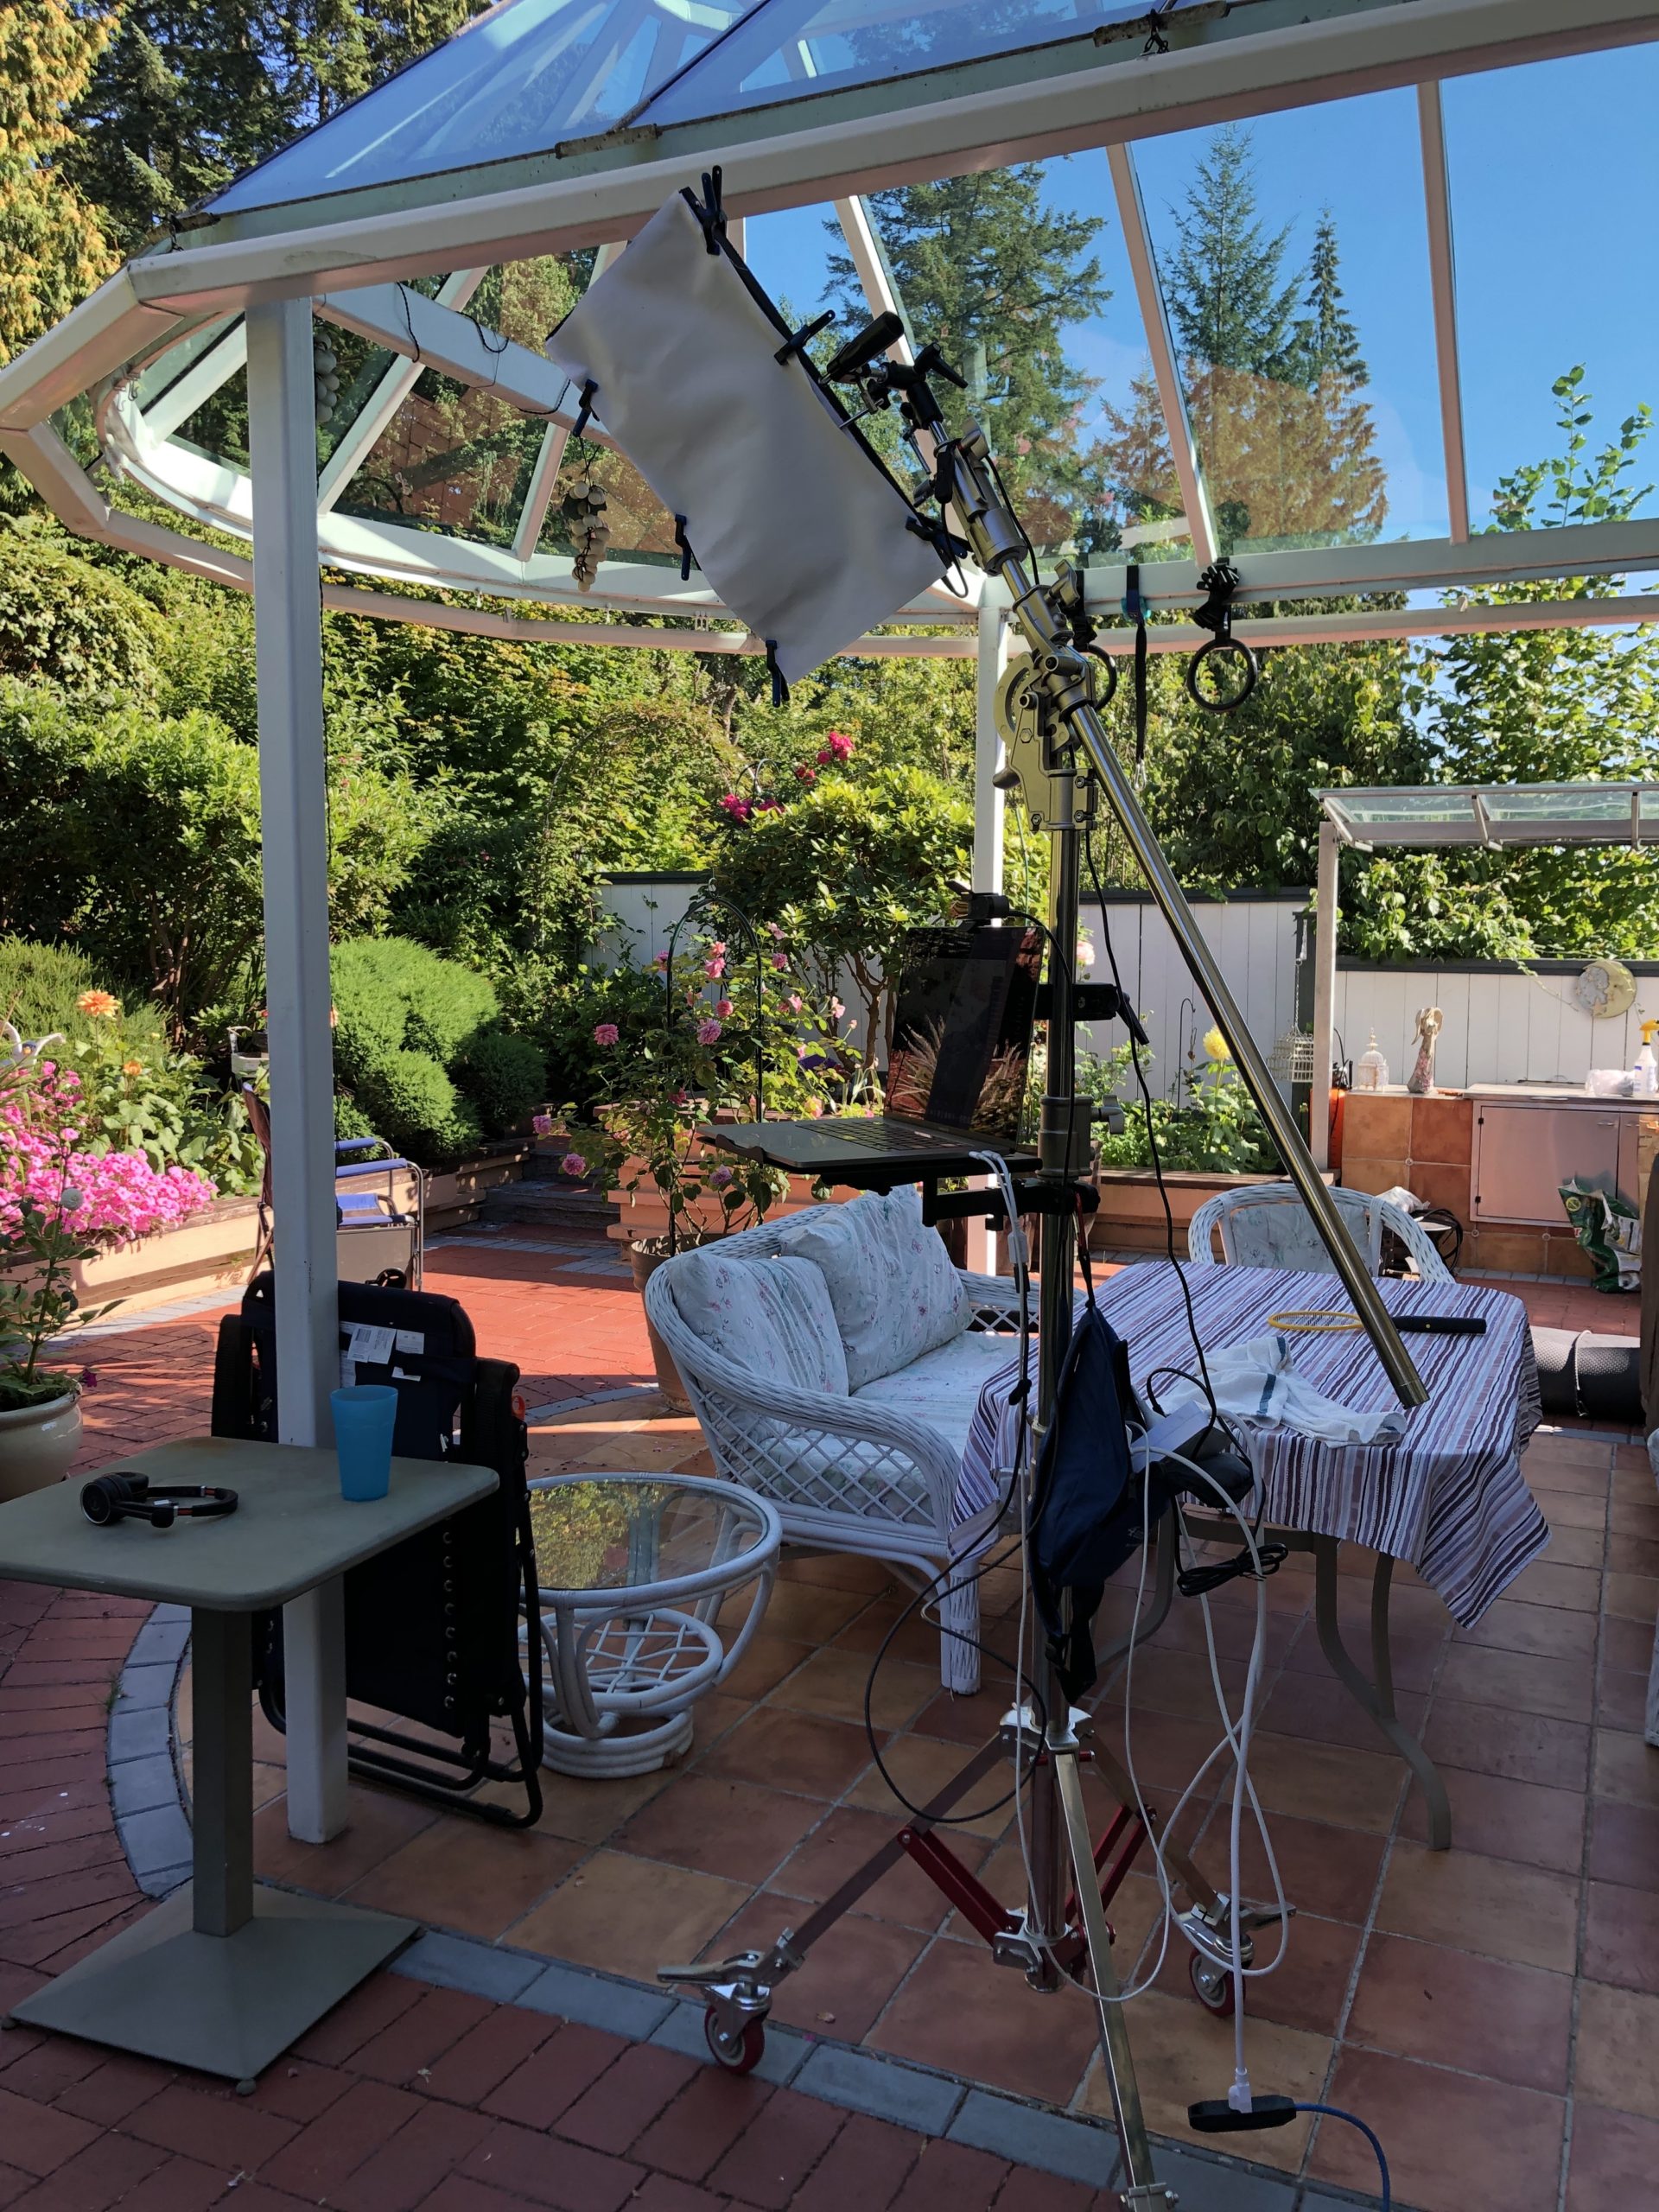
When it comes to lights bigger and softer are better. LED lights can not only save you space their brightness and light spectrum can be easily configured. I am still using the Aputure AL-F7 LED light as my key light and the Neewer 24″X24″ softbox which I talked about in greater detail in the post Dwayne’s DIY Video Setup – Part 4 Audio. I have incorporated the Neewer’s Rollable 30x53cm Flexible LED Light Panel Mat as my secondary light and shifted the use of the ESDDI 176 LED light to my seated video conferencing light. If I were starting from scratch and I didn’t have much space, I would consider using two Neewer Flexible LED Light Panel Mats. They take up very little space, are so lightweight they can be attached to almost anything, can easily be softened by simply adding diffusion material, and the remote control option to turn the lights on and off as well as to adjust the intensity and spectrum make them very easy to use.

Perhaps the biggest lesson I have learned with lighting is to soften or reflect the light so adding a softbox to my Aputure AL-F7 and other LED lights has been the first step to balanced lighting. If I had space I would get the largest softbox I could accommodate. Unfortunately, I am working in a very tight space so the 24X24” softbox is the most that I can fit. LED lights are so powerful that you can dial up the intensity and with the reflection in the softbox combined with appropriate diffusion you can get very natural and consistent lighting. To add additional diffusion I simply cut a piece of diffusion silk and clamp it onto the light with clamps.

I am still experimenting with the Neewer Rollable Flexible LED Light Panel Mats but as I mentioned earlier if I was starting over I would more than likely get two of these lights or another LED mat style light. Why? They are so thin and light that I have much greater flexibility in positioning them. This light takes up a fraction of the depth of my softbox setup with my Aputure AL-F7 and as result, I am able to position it far enough out of my shot that it limits the reflection in my glasses.

This may seem like a minor point but it is actually another significant lesson I have learned. Because I wear glasses I have to always be aware of the fact that if I don’t position my lights in a wide and high enough angle I will get a reflection. I have also learned that I need to dial down the brightness on my computer screen to limit the reflection in my glasses.

Because sitting for extending periods is not the best for your health, I stand while I work and while recording most of my videos so I have configured my audio and lighting to accommodate this position. I do also sit occasionally and so I also have another light that I use for video conferencing or when I am doing video evaluation. By simply dialing down the intensity on my ESDDI 176 and by adding a mini softbox I am able to get the benefits of a rim light without having to be limited by its layout.

Recommendations:
Key Light – Aputure AL-F7 Or Aputure Amaran AL-528
Fill/Key Light – Neewer Rollable Flexible LED Light Panel Mat
Fill & Background/Rim Light – ESDDI 176
Diffusion Silk – Neewer 2 Yard x 60 Inch/1.8M x 1.5M Nylon Silk White Seamless Diffusion Fabric
Softbox – Neewer 24” X 24”Softbox

While audio and lighting will have the biggest impact on your video set up there are many other aspects to setting up your office/studio for an effective workflow. Stay tuned for another post where I will point to the hardware and equipment, the physical space, the furniture, the soundproofing, and all the connective components that I use to improve my video setup and my workflow. The following are the links to my previous posts in this series:

Dwayne’s DIY Video Setup – Part 4 Audio
Dwayne’s DIY Video Setup – Part 3 LED Lighting Update
Dwayne’s DIY Video Setup – Part 2 Lighting & Background
Dwayne’s DIY Video Setup – Part 1 Teleprompter & Tripod
Dwayne’s DIY Video Creation Toolbox
My Video & Media Tools

If you just want to jump ahead to my recommendations for your audio click here. Or if you want to understand why I use this setup continue reading…

In that past several years that I have been making videos, I have been using the Blue Yeti microphone as well as an assortment of USB headsets. The Blue Yeti has served me very well for the past 8 years but the USB connector at the base of the mic is starting to wear and occasionally the connection doesn’t work. The connectors are the most common place were audio equipment fails so this is not surprising. Rather than take the Blue Yeti in to be repaired I have decided to step up from USB to XLR which opens up a world of options for improving my audio. Due to a recurring sinus problem and a subsequent surgical procedure to correct the issue, my already rough and raspy voice has become even rougher and raspier so having the ability to control my audio is important. The drawback of moving to XLR based audio is that the options are virtually limitless and the costs rapidly climb. It has taken me a few months of investigation and experimentation to find the right balance between getting Mics, audio interfaces, and accessories that will do what I need, give me the options I need, while not breaking the bank. I also don’t want or need to become a sound engineer to be able to use this new audio equipment.

Since the microphone (mic) is perhaps the most important part of your audio set up this is where I will begin. After scouring dozens (if not hundreds) of blog posts, podcasts, and YouTube videos on setting up audio for podcasting and Youtube videos I learned that most blogs, podcasts, and Youtube videos repeat the information that a few key individuals share. I have managed to narrow down my sources to those few key YouTubers who are actual professionals rather than wannabes echoing or parroting the experts. I also have some experience working with audio when my boys were in a band a few years back so I have some practical experience to help me discern what is useful and what isn’t.

Whenever you are purchasing any type of audio equipment you really need to look at the environment in which you will be using the equipment and be very clear about what you plan to do. Since my office is in a corner of our living room there, unfortunately, can be background noises that need to be filtered out. This is a really important factor in deciding what type of mic you will need to get. The ideal mic for video or podcasting if you have the luxury of a very quiet space or a soundproofed studio is a cardioid condenser Mic which is much more sensitive and can give you a richer and full sound without having to rely on the proximity effect (getting real close to the mic). If you are in a noisier environment like mine, then you will want to get a dynamic mic which does a really good job of filtering out background noises but if you stray from mic’s sweet spot which is directly in front of the mic and as close as you can get you will have significant drop off in your audio volume and quality.

One last factor that you should take into account before you purchase a mic is to consider if you will be the only person you will be recording and you do not see the need to add an additional mic to your setting or workflow. If you will only be working on your own then you really don’t need to move up to the XLR and can simply rely on the USB mics and your computer’s audio interface. However, if you plan to add another voice or you want to start moving up to more professional caliber equipment then the following information will be helpful.

Both of my boys are working with social media in their professions and their businesses. My older son recently started a podcast and will be interviewing people face2face and online so having the ability to multipurpose or share audio equipment with my boys is important. This will also mean that the equipment that I will be using will need to be more robust and flexible to handle the portable nature of face2face interviews and the diversity of setting in which the equipment will be used. I also don’t want to duplicate all the equipment so finding a mic that will work with both USB and XLR was important.

I initially considered upgrading to the USB/XLR Blue Yeti because of the success I have had with my USB Blue Yeti but the cost of this mic put it into a category of some other really good equipment options. Rather than spend the $350 just on one mic, I found that I could get 2-3 other mics and an audio interface for my office for less than the cost of the USB/XLR Blue Yeti. I also needed to have more than one person connect at a time so purchasing two Blue Yeti Mics put the cost up much too high and while these are great Mics they aren’t the most portable. They are quite large, heavy, and I don’t think they are as robust as some other Mics.

My research revealed that one of the best dynamic mics was the Shure SM58 which is a mic that is used by many musicians, voice actors, and podcasters but this mic does not offer a USB connectivity so it did meet my initial criteria. I am still planning on getting a Shure SM58 but plan to purchase one used since these are almost indestructible mics and you can find them for sale used for significantly less than full retail on Craiglist.

Next to the Shure SM58 the Audio Technica 2100 and Samson Q2U have very positive reviews by the Youtube and podcasting community, offer both my USB and XLR connectivity, and are reasonably priced. Both these mics are almost identical and the Samson Q2U is more available outside the US and is also a bit cheaper. Both mics come with a USB and XLR cable, windscreen, and tabletop stand so you have almost everything you need to get started. Since you can’t connect the XLR mic directly to your computer you will need to an audio interface.

Zoom H%

Zoom H5

I decided to go with the Zoom H5 mobile recorder because it not only gives you mobile mixing and recording it has the ability to function as an audio interface so you can also connect this device to your laptop in your office or studio setting. There is also the option of running the H5 as the preamp and connecting directly to a DSLR, so this audio device offers many options for both the studio and mobile setting. Zoom has a range of recording/audio interface options so narrowing the choice down to the Zoom H5 came down to considering my current and potential needs. I wanted the best quality sound so I knew from the research that the older and less expensive Zoom H4N Pro didn’t offer as cleans sound as the new and more expensive Zoom H5 or H6. The H5 has the same pre-amps as the H6 so the recording quality is a good as the H6 but since we don’t need to connect up to 6 mics in a mobile setting we saved $200 by going to the H5. We also found the device used on Craigslist so we saved even more. The Zoom H5 comes with 2 XLR inputs and we can easily purchase a the XLR extender if we need to add two more inputs. Finally, the device is designed for mobile use so it is quite small and takes up very little space on a desk.

While my original plan was to just use the Zoom H5 for both my office and mobile needs I stumbled across a deal on Craiglist that I couldn’t refuse. When I was looking for a used Shure SM58 Mic I came across a BM-P800 mic and the Behringer U-phoria UMC22 audio interface for just $40 for the set which is a 1/4 of the cost of both of these devices new. The BM-800 mic is a condenser mic which I wanted to experiment with that is relatively cheap but performs as good as mics that are considerably more expensive so this was a positive. The other positive is that the Behringer U-phoria UMC22 audio interface enables me to set up a more permanent audio connection in my office. I don’t need to use the Zoom H5 as an interface and can keep that as part of my mobile kit. If I didn’t have the need to do some mobile recording I would have purchased the Behringer U-phoria UMC22 audio interface because it gives me everything I need at a very low cost so this deal for both the mic and the audio interface was a blessing. I have also noticed that there are lots of people who have lost interesting in podcasting or are upgrading to better equipment so there are lots of deals on Craiglist. The only issues are having to wait for the right deal to come up. If you have the time this could be a way to save lots of dollars.

The final piece of my audio upgrade is the mic arm and stand. Because I have a tendency to talk with my hands will tap on my desk which is easily picked up by a condenser mic a shock mount is also required. I have been experimenting with a variety of mic arms and have narrowed things down to two different stands. Still not sure which one will work the best but lately I have been using my Kick Drum/Amp mic stand more than the Neewer NW-35 Metal Suspension Boom Scissor Arm Stand. The Kick Drum/Amp mic stand is intended for micing a kick drum or amp so that it doesn’t have that much height which works well in my office. I am using an Ikea Lack side table for my standing desk and since it isn’t secured to the main table top I am able to move it to one side when I want to use my Teleprompter. Since the Kick Drum/Amp stand isn’t secured to anything but has a small weighted based I can easily move it to the side. The scissor arm stand is convenient to use as well but it has to be secured to the Lack side table and I have found it can get in the way. Depending on your situation either option will work well.

Recommended equipment:
Samson Q2U or Audio Technica 2100
Behringer U-phoria UMC22 (only if you want to use XLR)
Zoom H5 mobile recorder (only if you need a mobile option)
Kick Drum/Amp mic stand
Neewer NW-35 Metal Suspension Boom Scissor Arm Stand (comes with a shock mount)
Knox Microphone Shock Mount for Audio-Technica ATR2100-USB

Alternate Option
Blue Yeti (great USB option)
Blue Yeti Pro XLR

Dwayne’s DIY Video Setup Series
Dwayne’s DIY Video Setup – Part 1 Teleprompter & Tripod
Dwayne’s DIY Video Setup – Part 2 Lighting & Background
Dwayne’s DIY Video Setup – Part 3 LED Lighting Update
Dwayne’s DIY Video Setup – Part 4 Audio

A Lesson on Looking

Dwayne Harapnuik —  December 19, 2018 — Leave a comment