Lighting
The following video is not intended to be instructional but rather more conversational in the sense that I am showing you the lighting setup that I am using for video creation. I am also not attempting to give you a detailed recipe or specification for your lighting needs or situation. Your budget, use, time, and location, as well as your comfort with experimentation, will be determining factors in what type lighting solution you finally come with. The video is intended to give you an overview of what I am currently using and the following recommendations and links to help you get a good start on your video setup. I also need to point out that I am currently at a crossroads with my lighting needs. The lighting equipment that I have is several years old and when I purchased it, LED lighting equipment was much too new and expensive to fit into my budget. If I were purchasing my lights today I would definitely be considering LED lights because of their flexibility and their decreased size. LED lights can be very powerful, put out very little heat, are dimmable, you can run off Sony NP-F batteries for hours, and because they are so lightweight you have many more options on how you can mount and use them. Since my living room doubles as my studio I am looking at switching to an LED setup so that I have more room to work. But even though their costs are falling LED lights still do cost considerably more then Compact Fluorescent Lighting (CFL).
I am currently using the Cowboy Studio Photography & Video Portrait Umbrella Continuous Triple Lighting Kit which I purchased over 3 years ago for around $120. The kit sells today for the amazingly low price of $62.00 with free shipping if you have Amazon Prime. If you just want to experiment with video creation, then this CFL kit is the cheapest way to explore and learn. I like doing the white out background so I have added a couple of LimoStudio LimoStudio Softbox lights. These are also CFL but the price has come down to around $80 for a pair of lights with stands. If you want to do the infinite white background or the “Apple Look” and you want to start with a low budget then Cowboy Studio Photography & Video Portrait Umbrella Continuous Triple Lighting Kit and LimoStudio LimoStudio Softbox lights will give you what you need for lighting for under $150.
What would I purchase today? Since I already have stands, umbrellas, reflectors and other gear that came with my CFL lights I only have to purchase the lights. As I stated above my biggest motivator for moving to LED lights is that they take up much less space and offer greater flexibility. If I were starting from scratch and I knew that I was going to be using the lights consistently over an extended period I would consider LED. While the prices have come down significantly, it is still very hard to compete with a full CFL lighting kit complete with stands and umbrellas for under $70. I want to remind you that if I was just looking to experiment and see if making my own videos is something that I would continue to do you can’t go wrong with the low-cost CFL options I am currently using that are linked above.
Before I make my recommendation on LED lights I suggest that you watch the following videos from Caleb Pike who has the Youtube channel DSLR Video Shooter. There are so many people claiming to be experts offering reviews on Youtube that it can be difficult to know who to trust. I came first across Caleb’s video How to Light People With Glasses and Avoid Glare when I was trying to sort out how to set up my lighting to deal with the reflection I was getting in my glasses. I looked at almost a dozen videos dealing with how to resolve the reflection issue and Caleb’s video was among the best. He obviously has significant experience to draw upon and offered me a very useful solution. Caleb is an actual professional photographer not just someone who is trying to make money off of making video reviews.
I have been following his channel for a few years now and as I look into moving to LED lighting I turned to his videos for some direction. The following video is a good starting point:
10 Things to Consider When Buying Video LED Lights
I have included a short summary of his 10 points:
- Budget – LED is getting cheaper so you have more options.
- Use – you need to plan for a variety of lighting setups
- Output – LM, Lux – don’t be fooled by the number of LEDs
- Color rendering index CRI – 95+ is recommended, 90 is OK, and 85CRI is bare minimum – Please note there is some debate as to the validity of CRI with LED lights so have a look at the following video to see for yourself what other factors you may want to consider – Is CRI Relevant In An LED World?
- Color Temperature – Daylight (56K) is best because you can always filter with tungsten (32K) filters. Bi-Color lights split between daylight and tungsten but you lose half the half the lights
- Power – DC jack uses a cable to plug into standard outlets & Battery Options – Sony MPF batteries are standard and interchangeable
- Beam angle or how hard or soft the light – spot vs flood light – Spots give you more flexibility because you can always filter the light to soften.
- Multi-chip vs single chip LED – Multi is cheaper but if you have a professional need and budget the single chip lights give you better quality and more options.
- Edge color distortion – cheaper LED lights may have a breakdown in quality of the light near the edges of the lights – Higher CRI
- Extra features – battery level features, dimmer MUST have, mounting options, extra batteries.
Caleb offers the following review videos that point to all the components you need for a standard 3 point lighting setup. If you are looking to do the infinite white “Apple look” background then you will need to add a couple of extra lights.
$250 LED Video Lighting Kit
Best $500 Video Lighting Kit and What You Can Do With It
Just in case you are on a super shoe-string budget you may want to check out Caleb’s video Complete Video Light Kit for $150 and How to Use It. But if money really is an issue then the Cowboy Studio Photography & Video Portrait Umbrella Continuous Triple Lighting Kit and LimoStudio LimoStudio Softbox lights will give you what you need for lighting for under $150. The CFL option will give two more lights/softboxes and you need to understand that while LED lights in this video may get you started if you want to upgrade down the road you will be replacing them completely.
Since I already have light stands and other gear I only need to replace my lights so I have been reviewing Caleb’s videos where he reviews a wide assortment of LED lights:
10 Video LED Lights $50-$100
7 Great Video LED Lights Under $50
I think that the $500 Aputure lighting kit may be one of your best options because of the following key piece of information regarding LED lighting that you need to take into consideration. In the lighting kits videos, Caleb stresses that it is important to use lights from the same manufacturer. He briefly alludes to the fact that using the same lighting manufacturer will ensure a consistent color balance in your LED lights but he doesn’t explain just how important this really is. For most people just starting out just getting the lights into the right position will be the first challenge so talk of color balance may be too much but this is actually extremely important especially if you are intending to have people in your videos because the color balance can adversely affect skin tone. If you are making instructional videos like I am then this is a crucial factor.
I was fortunate enough to come across a very important video by Ryan Walters of Indie Cinema Academy that explains just how important it is to have a color balance LED source and the problems you can have if you don’t have that balance. In the video The LED Problem & What To Do About It. Ryan explains in great detail how to eliminate the problems with color balance when using LED lighting. Many people may be overwhelmed by the detail in the video so I will simply summarize that the best way to ensure you get consistent color with LED lighting it to pick LED lights that have a high R9, R13, and R15. Unfortunately, most LED manufacturers, especially at the consumer level, do not share the R values on their lights so the best way to ensure that you get the best color balance is to use the exact same LEDs on your talent (subjects). Indie Cinema Academy has created an LED color database with over 40 lights that have high R9, R13, and R15 values.
Most of the lights in the database are professional quality and cost hundreds or thousands of dollars which may be well beyond what most people who are not involved in professional video productions are willing to pay. However, the Aputure Amaran H672 is a recommended light and is the key light in Caleb’s $500 video kit listed above. Aputure is renowned for making very affordable high quality LED lights as you can see in Aputure LED Light Review. These lower cost prosumer lights offer a very solid entry point into LED video lighting. Because you can’t easily mix and match LED lights you need to choose LED lights from the same manufacturer that you can add to as your needs grow.
If I were to start from scratch and had more than $500 – 600 to spend on lighting and background equipment I would start out with Caleb’s recommendation on the $500 Aputure light kit which includes:
- Aputure Amaran HR672S LED Spot Light: $278
- 2x x` $58 each
- 2x Battery Kit: $32
- 3x Light Stand Kit: $42
- Reflectors : $16
- Reflector Holder Kit: $30
- Diffusion: $10 –
The total is actually $524 and it is due to Caleb’s pricing the H198 at $48 and they are currently selling for $58. I also upgraded the Light Stand kit to include a packing bag which is worth the extra $5. I don’t recommend the $250 Neewer Light kit that Caleb points to in the video $250 LED Video Lighting Kit. Why? It uses the lower quality Neewer lights which not only don’t list their CRI nor the R9, R13 and R15 values, they aren’t listed in Indie Cinema Academy has created an LED color database. Yes, they will give you lots of light but you may have issues with your skin tones and when you go to upgrade you will not have a viable upgrade option. If you want to save some money simply replace the Aputure Amaran HR672S LED Spot Light with two more Aputure Amaran H198 LED Lights. The H198 are stackable which means you can mount one light on top of the other and have a 398 LED light for $116 for your key light and save $162 lowering your total purchase price to $362.
Remember the Aputure lights are of high enough quality that you can add an H672 at a later date and not have to worry about the color balance. If you are planning to upgrade then this is good option to consider. The Aputure Amaran lights are good enough to provide professional quality color and from what I have seen in reviews have a build quality at the prosumer level so this kit would be a great starting point. You can easily add additional H198 lights to give you additional lighting for the infinite white background setup and other lighting needs.
When I purchased my initial lighting kit a few years ago I did look at LED lighting but the costs were still too high. I purposely went for a temporary solution because I knew I would be replacing these lights in the future so I didn’t spend that much money. Now that I am looking to increase my video production I am looking to upgrade so creating this post has been useful in that it has forced me to narrow my focus and make an informed decision. The Aputure Amaran lights are at the top of my list.
Background
The last bit of gear you will need is your background paper and stands. I recommend using something like the Neewer Pro 10×12 feet/3×3.6 meters Heavy Duty Adjustable Backdrop Support System because you will want to use paper for your backdrops and these rolls do weigh more than the muslin cloth. I have experimented with muslin backdrops but keep on going back to traditional paper because they offer a more consistent lighting background and you don’t have to iron or steam out the wrinkles in the cloth every time they are used. Since I do have to pack away my video setup after each use the muslin get wrinkles from the folds.
If you only want to go with one backdrop color to start with then white should be your first choice because a white background can give you the infinite white effect (Apple look) and you can also make the background look grey. Savage 107X12-1 Seamless Background Paper costs $70 and is the industry standard that most photographers and videographers will use. You can save a few dollars and go with a narrow width but that will limit your options with your setup.
Lighting Setup
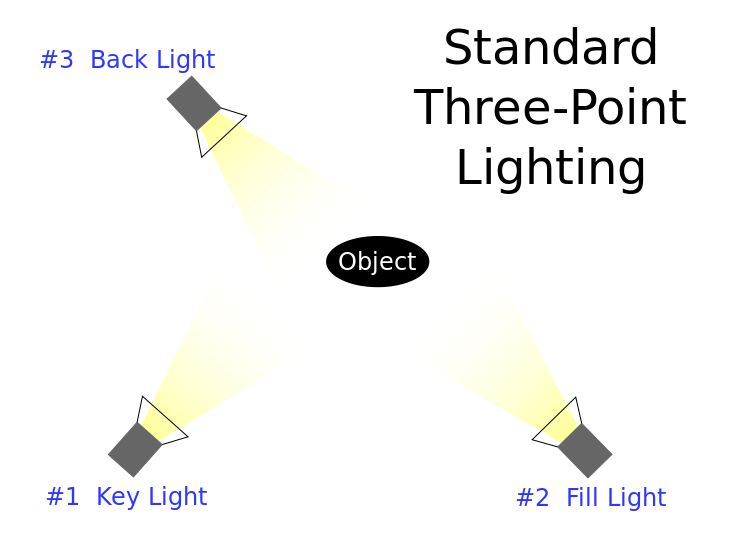
Source: https://en.wikipedia.org/wiki/File:3_point_lighting.svg
3 Point Lighting
- Filmmaking 101 – Three Point Lighting Tutorial
- What is three point lighting and why do we use it?
- Three Point Lighting for Video: A Slight Variation
- Frameforest Filmschool: 3 point lighting
Infinite White (Apple Look)

- How to Get the White Background Look
- E04: Get That Pure White Background Look (Apple Video Style)
- White Background Tutorial – DIY Video Studio
In part three of this series, I will touch on your options for high-quality audio… stay tuned.
Dwayne’s DIY Video Setup Series
Dwayne’s DIY Video Setup – Part 1 Teleprompter & Tripod
Dwayne’s DIY Video Setup – Part 2 Lighting & Background
Dwayne’s DIY Video Setup – Part 3 LED Lighting Update
Dwayne’s DIY Video Setup – Part 4 Audio


